
Managing tables
This article is relevant for:
LEADER; AUTHOR
Adding/removing a table
To add a table, place your cursor at the location where you want to add the table and click on Table from the INSERT menu. You can either select to add a Table with title or Table without title (for pure layout reasons). A Table with title is listed in the list of Tables and has an automatic label (e.g. Table 1) and a title.

It is also possible to determine the number of rows and columns manually using the "Insert table" option

Two tabs named TABLE and TABLE STYLING will appear in the Menu bar whenever your cursor is inside a table:

The TABLE menu contains table formatting tools like adding rows, columns, merging cells, changing the text alignment, etc.
The TABLE STYLING menu: contains options to enrich table layouts with borders, border styles, background colors, etc.
Please note
Most of the menu items available in the TABLE menu can also be accessed by right-clicking in a cell of the table.
It is possible to set the size of the table to be displayed in the final exported version of the draft.

Please note
The size of a table set in the OSD platform cannot be viewed the online draft version. It is applied to table only when the final draft is exported.

Background colour of selected rows, columns, cell(s) can be modified to three shades of grey:

If you are working with a large table, you can expand the table view with the Expand icon.

To delete a table, select Remove from the contextual menu of the table.

Making a row the header row
By default, the first row of your table will be a header row (light grey background). Place your cursor anywhere in the table and click on Add header row from the Headers menu to make the second from the top as an additional header row.

Similarly, you can remove a row as header.

Please note
- You can create as many header rows as you wish but it is not possible to create Header columns
- Text in header rows will be automatically center-aligned
Insert/Delete columns or rows
- Place your cursor inside a cell and:
- select Add row above/below from the Row option (in the TABLE menu) to insert a row
- select Add column left/right from the Column option (in the TABLE menu) to insert a column
- select Remove row from the Row option (in the TABLE menu) to delete a row
- select Remove column from the Column option (in the TABLE menu) to delete a column
You can use add rows/columns to a table directly from the table by using the " +" icon inside the table or by right clicking inside a cell and selecting the appropriate option.
You can also select an entire row or column and then click on the Remove icon that appears in the menu.

Splitting and merging cells
Place your cursor inside a cell and:
- select Split into rows from the Split cells menu to split a cell into two rows
- select Split into columns from the Split cells menu to split a cell into two columns
- select Merge cell above or Merge cell below from the Merge cells menu to merge two cells in adjoining rows
- select Merge cell left or Merge cell right from the Merge cells menu to merge two cells in adjoining columns
Alternatively, you can use split or merge cells by right clicking inside a cell and selecting the appropriate option.

Please note
Splitting/merging can only be done one cell at a time.
Adding/removing formatting borders
By default, a table has the line borders of width = 1px.
You can add, remove, format borders and border styles for selected row(s), column(s) and cell(s) using the Line weight and Line style dropdown options in the TABLE STYLING menu.

Defining column width
To change the width of your columns, use on the Set column sizes menu from the TABLE menu. In the Edit column sizes pop-up window that appears, drag the columns to adjust their widths. To divide your column evenly, click on Divide Evenly button. Once you are happy with your selection, click on the Apply button.
Click on the Close button to close the Edit column sizes pop-up window.

Text alignment in cells
To change the alignment of the text inside a cell, use the text alignment options available in TABLE menu. You can align the text vertically (top, bottom, middle) and/or horizontally (left, right, center) as required.
You can do this one cell at a time, or select a whole row/ column to apply the formatting to.

Selecting entire rows or columns
You can click on the small rectangle at the beginning of each row / column to select the entire row / column. You can then apply formatting and option to the entire row / column

Adding table footers and footnotes

To add a footnote to a table, place your cursor at the location where you want to insert the footnote and select Footnote from the REFERENCE menu. Then type the footnote text in the TABLE WRAP FOOTER.
Please note:
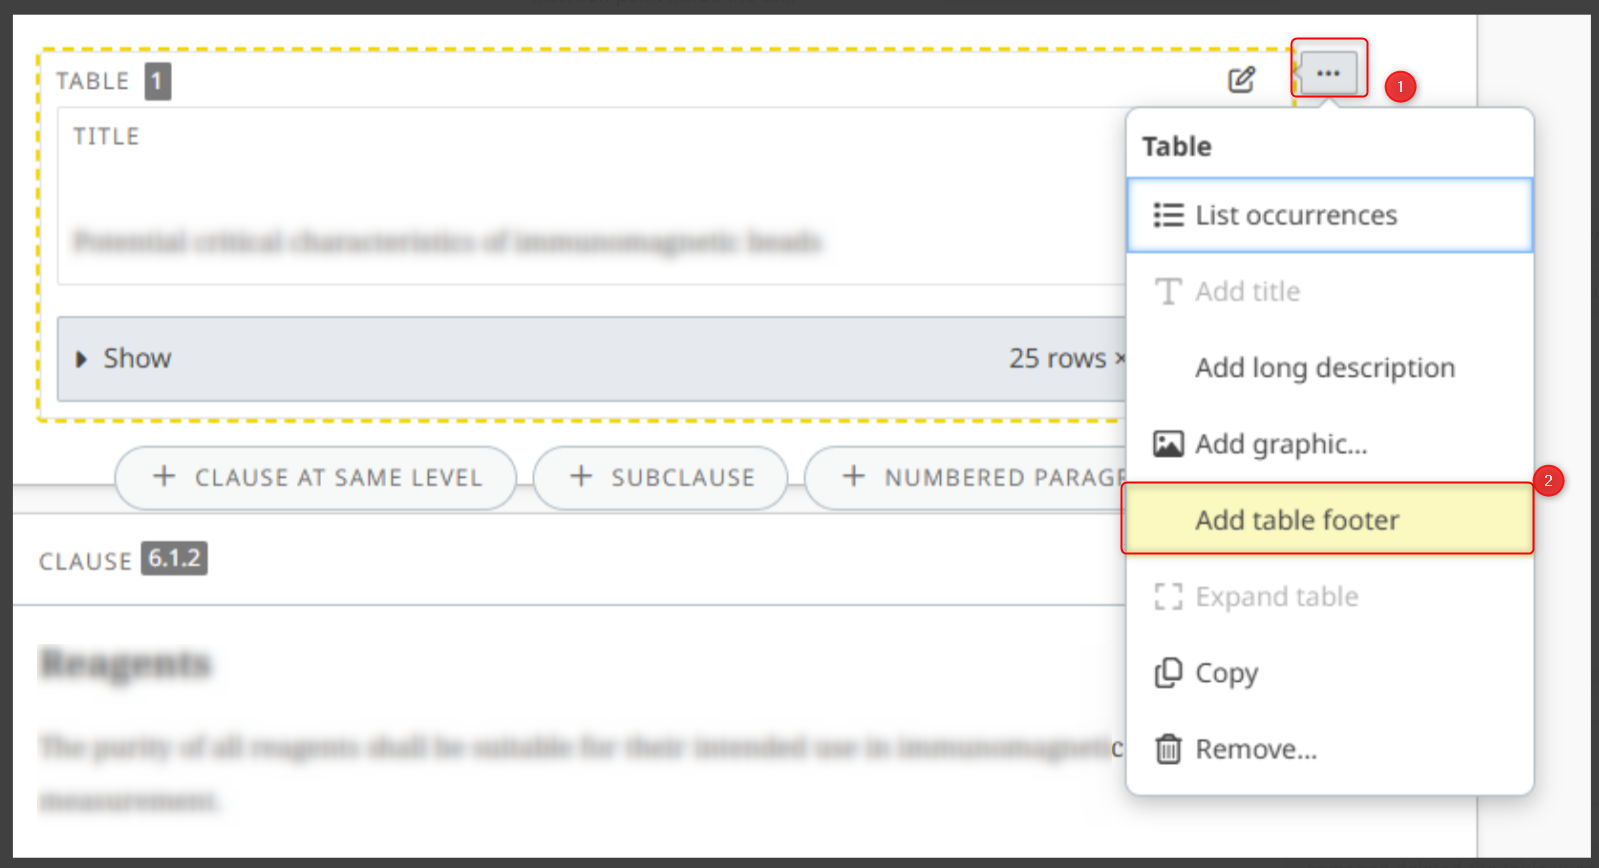
The TABLE WRAP FOOTER is automatically created when a new Table with title element is created. If the Table WRAP FOOTER is removed from a table, then a footnote cannot be added within the table cells. Therefore first the TABLE WRAP FOOTER must be added back, and then the footnote within a table can be added. To add the TABLE WRAP FOOTER:
- Click on the More actions (three dots menu) next to the table
-
Select Add table footer

You can reference the same footnote multiple times inside the same table. To do this, place your cursor where you want to add the reference select Link to an existing table Footnote from the REFERENCE tab.

Related articles
Fore more information about footnotes, please view the article Add footnotes.
Add table key
To align with Directives, Part 2 (DP2, section 29.5.3), OSD supports the use of keys in tables. Users can add or remove a key for a table as needed.
A table key contains two columns: one for the term and one for its definition, allowing explanatory information to be clearly associated with table content.
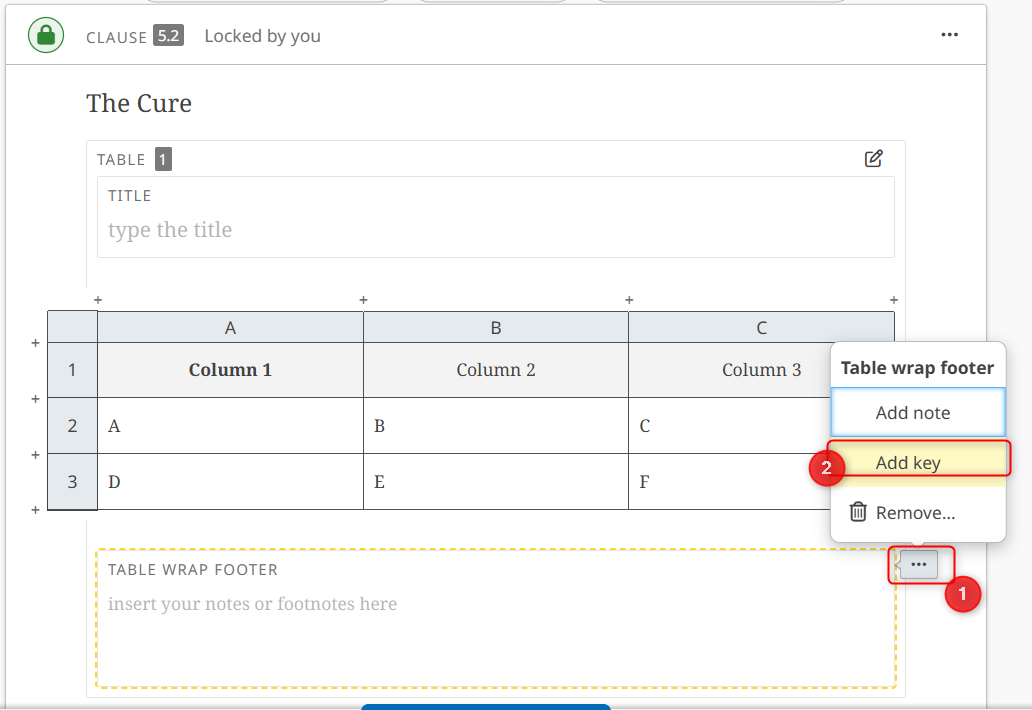
To add a key to a table:
- Go to the table wrap footer of the relevant table.
- Click the More options (three dots) menu.
- Select Key.
A key will be added to the table, where you can enter terms and their corresponding definitions.
Please Note:
It is not possible to modify the column widths of a Key placed within a table or other elements (such as figures), as the Key functions as an abbreviation list rather than a table element.
Remove a key from a table
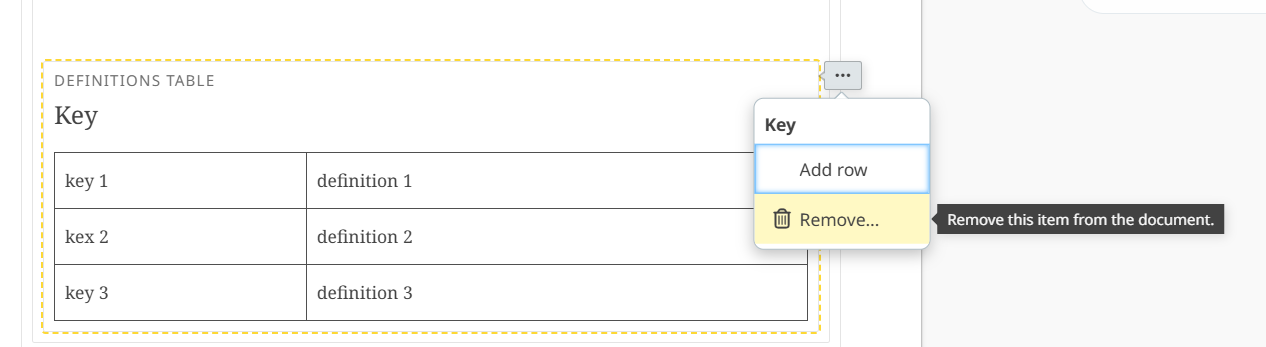
To remove a key from a table:
- Click the More options (three dots) menu in the key.
- Select Remove.
Add table notes
To add a Note to the table, place your cursor in the TABLE WRAP FOOTER and select Note from the INSERT menu.
You can also add notes by selecting Add note from the contextual menu of the TABLE WRAP FOOTER

Create a table without title (for layout reasons only)
If you want to format your text in tabular format, without creating a formal table, select the option Table without title from the INSERT menu and select the number of columns and rows. By default, the layout table (also called an ARRAY table) is created without a header, and it has fewer options (no table footer or table note)

Expand table
It is possible to expand the view of a table to see more. To do so, click on the three dots on the right at the level of the table number and select "Expand table":
