
Add, edit and remove graphics
In this article
This article is relevant for:
LEADER; AUTHOR
Related articles
Since October 1, 2024 and the implementation of an Asset management system, graphics are managed as assets. The list of authorized image formats have been extended.
More information is available here: New Asset Management System for OSD - Q&A
All assets of an online document are gathered in an Asset library visible within Projects. The asset library becomes the master source of graphics. Thus graphic files no longer need to be submitted through the Submission interface. For more information available in the article: Submit your file.
Graphic types
| Graphic types | Description and purpose |
|---|---|
| Figure |
A figure that will be listed in the Table of Figures, with an automatic label, e.g. Figure 1, and a title. Figures can have a key associated, and you can add multiple graphics to the same figure. |
| Figure containing sub-figures | Same as Figure but containing multiple automatically labelled sub-figures, e.g. Figure 1 a), Figure 1 b), all listed in the Table of Figures. |
| Image | A small simple graphic inside your text, without title or label. |
| Inline image | A small graphic inline with your text, without title or label |
Add a graphic
To add a graphic, place your cursor at the location in the text where the graphic should be added and click on Graphic from the INSERT menu and choose the type of graphic you want to add.

A pop-up modal will show you the image library. The image library contains all graphics from the Asset library that are not yet used in the online document. Select the graphic you want to add and click Insert. To add a new graphic to the asset library from your computer click Upload asset.
Note
A graphic can only be used once in the online document.

When you upload a new asset, there are several aspects to include:
- Asset type - a descriptive of the graphic (Illustration, Flow chart, etc)
- Display file (PNG, JPG, SVG) - the file that will be seen in the document until it is processed by ISO/CS. If a display file is not available from a previous edition or from the creator of the graphic, this can be a screenshot.
- Revisable file - The file that will be used by ISO/CS to create the final graphic for publication. The revisable file can be uploaded later on in the process but must be provided before you submit the document to ISOCS. You will find at the bottom of this page the list of authorized image file format and how to add a revisable file to an asset.
- Contains language text, Alternative text, and Description are not currently used and until they are activated can be ignored.

Figure
Figures are automatically numbered inside the document when they are added, starting with Figure 1 and incrementing with each new Figure. More information on autonumbering is available in this article: Automatic numbering
When a Figure is inserted, it is possible to type the title of the Figure and add a key, an array, notes, examples, paragraphs, or an additional graphic to the figure.

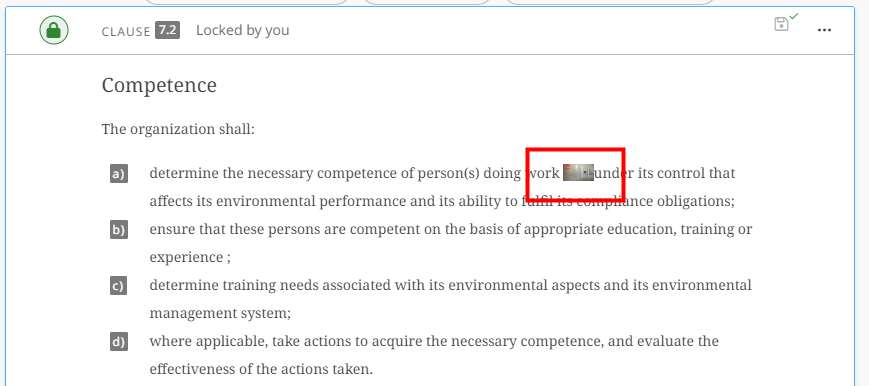
By selecting the "Pencil-edit" icon, the display of the figure can be changed and adapted depending on one's needs. Size, Orientation and Dimensions have been made available.

Please note
- The size of a figure or image set in the OSD platform cannot be viewed on the online draft version. It is applied to figure or image only when the final draft is exported.
- For a figure containing multiple images, the selected size and orientation settings are applied at the level of the figure and not the individual graphics (i.e. it applies to all the images in the figure.)
- To change the image of your figure, right-click on the graphic and select Change graphic.
- Dimensions has been added allowing users to determine the unit of measure (e.g. mm, cm, etc...)
Figure containing sub-figures
Once you have added your first sub-figure, you must click on the LAYOUT edit icon and select an appropriate layout (1X2, 2X1, 1X3 or 2X2) before you are able to insert another sub-figure.

Once done, from the context menu of the figure, select Add sub figure, select a sub-figure, and click on the Insert button. Repeat the last step to add more sub figures.

IMPORTANT
There are controls to ensure that users cannot insert more sub-figures than allowed as per the layout selected.
Note
For a draft containing sub figures, the HTML rendering is different from the DOCX rendering.
Image and inline image
Image and inline image are not formal figures and therefore do not have a number nor a title.
Edit (add a new version to) a graphic
To edit (add a new version to) a graphic or its related files and/or metadata, right-click on the image. A menu will show allowing you to view or edit the metadata, change the graphic or remove the image.

View asset metadata
The view asset metadata enables to:
- review the registered information for the asset: asset type, original file names and other metadata
- access the asset in the Asset library by clicking the link Show in asset management system

Edit asset metadata / add a missing revisable file
Display the asset upload screen allowing you to update the display and/or revisable files and edit any other metadata. The Asset library will then be updated accordingly.
How to add a missing revisable file to an asset
To verify if some assets are missing the revisable file that will be required for submission to ISOCS, open the Asset library and use the Quick filter > Missing required revisable files. It will display the list of assets where a revisable file will be required during submission to ISOCS.
To provide the missing revisable files, open the online document, browse the document to find the correct image, right-click on the image and select Edit asset metadata. This will open the asset upload screen allowing you to upload the revisable file.
To make sure you have identified the correct asset in the online document, you can view the asset's name from the XML source panel. Just click on the image, open the XML source panel, you will see the asset name in the XML code. This feature will be improved in future OSD releases.

How to update an existing figure
If you don’t have the updated display and revisable files for the figure:
1. Go to Asset library tab in Project. Download all the files (you’ll see the figure numbers in the downloaded files).

2. Find the correct figure file in the downloaded zip and update the revisable graphic file.
3. Create a screenshot of the updated graphic to be used as the display file.
Once the updated files are ready:
4. Go to the online document and find the figure in the OVERVIEW tab.

5. Right-click on the image and select Edit asset metadata.
6. Click the field for the Revisable file to upload the updated revisable file.

7. Click the field for the Display file to upload the updated display file.

Remove or delete a graphic
Remove a graphic from the online document
To remove a graphic, either right-click on the image and click on the contextual menu of the image.

This action will remove the graphic from the online document. It will release it and make it available again to the image library. So it can be used elsewhere in the document.
Delete a graphic (delete the asset from the Asset Library)
To delete an asset from the Asset library, it first must be removed from the online document.
Once the image has been removed, open the image library by selecting Change graphics, select the asset you wish to remove and click on the button Remove for everybody. This action will delete the asset from the Asset library.


Note that if the asset existed in a past version of the document, the latter will be kept. If you wish to retrieve it, you can download it from the Asset library.
List of authorized image file format
Since the 1st of October 2024, the list of supported formats of image files was extended as follows:
- Display file : PNG, JPG, SVG
- Revisable file (following DRG directives):
- AutoCAD (.dwg or .dxf)
- Illustrator (.ai)
- Vector file type (.eps, .svg, .wmf or .emf)
- Word (.doc .docx), Excel (.xls .xlsx), Powerpoint (.ppt .pptx), Visio (.vsd .vsdx)
- CorelDraw (.cdr)
- Photoshop (.psd)